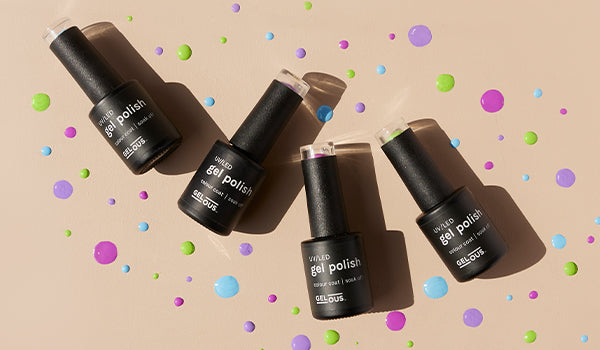


After far too long in lockdown, we’re ready to bust out the festive Gel Nail Polish art and really go next-level.
There's no wrong way to do Christmas nail art, but if you need some ideas let us introduce you to some of our favourite Christmas nail art creations. Subtle or flashy, cute or classy - there’s something for every vibe!
Glitter Tips & Holly Gel Nail Polish Design

Bring the glitz, glitter, and glamour of the holidays with some sparkly, festive Christmas nail art. Watch our YouTube tutorial here or follow along using the instructions below.
Gel Nail Polish used: Base Coat, Champagne Showers, Dirtbag, Damn You're Pine, Darkest Forest, A Dozen Roses & Top Coat.
Gel Nail Art Brushes used: Short Striping Brush & Dotting Tool.
- Complete your nail prep.
- Apply a thin coat of Base Coat & cap the free edge. Cure under your Gel Nail Lamp for 60 seconds.
- Using the Champagne Showers polish brush, gently stroke a curved tip onto each nail.
- Tidy up the edges using the Short Striping Brush. Cure under your Gel Nail Lamp for 30 seconds.
- Using your clean Short Striping Brush & Dirtbag, paint a curved line for the branch on each nail. Cure under your Gel Nail Lamp for 10 seconds.
- Using your clean Short Striping Brush & Darkest Forest, stroke small curved lines towards the branch. Cure under your Gel Nail Lamp for 10 seconds.
- Using your clean Short Striping Brush & Damn Your Pine, mimic the previous step, painting in between the leaves. Cure under your Gel Nail Lamp for 10 seconds.
- Using your Dotting Tool & A Dozen Roses, dot randomly placed berries. Cure under your Gel Nail Lamp for 10 seconds.
- Apply a thin coat of Top Coat & cap the free edge. Cure under your Gel Nail Lamp for 60 seconds.
- Apply Cuticle Oil around your nails & rub into your skin to nourish & moisturise.
Xmas Sweater Gel Nail Polish Design

The season for all things festive is upon us, so why not get embrace it with this cozy nail art? Watch our YouTube tutorial here or follow along using the instructions below.
Gel Nail Polish used: Base Coat, Redwood, Rich Mahogany, Just White & Top Coat.
Gel Nail Art Brushes used: Short Striping Brush.
- Complete your nail prep.
- Apply a thin coat of Base Coat & cap the free edge. Cure under your Gel Nail Lamp for 60 seconds.
- Using your Short Striping Brush & Redwood, gently paint a vertical line from near cuticle towards the free edge. Repeat this step, moving the brush along sideways so your line is slightly thicker.
- Using the same technique, gently paint a horizontal line. Cure under your Gel Nail Lamp for 30 seconds.
- Using your clean Short Striping Brush & Rich Mahogany, paint two vertical lines either side of the Redwood line.
- Using your clean Short Striping Brush & Just White, paint one horizontal line between the other lines.
- Paint two horizontal lines between the other lines. Cure under your Gel Nail Lamp for 10 seconds.
- Apply a thin coat of Top Coat & cap the free edge. Cure under your Gel Nail Lamp for 60 seconds.
- Apply Cuticle Oil around your nails & rub into your skin to nourish & moisturise.
Xmas Wreath Gel Nail Polish Design

This simple design has everything you could possibly want from Christmas themed nails. Watch our YouTube tutorial here or follow along using the instructions below.
Gel Nail Polish used: Base Coat, Just White, Damn You're Pine, Red Sass & Top Coat.
Gel Nail Art Brushes used: Short Striping Brush & Dotting Tool.
- Complete your nail prep.
- Apply a thin coat of Base Coat & cap the free edge. Cure under your Gel Nail Lamp for 60 seconds.
- Apply two thin coats of Just White & cap the free edge. Cure after each coat for 60 seconds under your Gel Nail Lamp.
- Using your Short Striping Brush & Damn You’re Pine, gently paint a curved line to create the branch.
- Flick out curved short lines to create the leaves. Cure under your Gel Nail Lamp for 10 seconds.
- Apply a thin coat of Top Coat & cap the free edge. Cure under your Gel Nail Lamp for 60 seconds.
- Apply Cuticle Oil around your nails & rub into your skin to nourish & moisturise.
Glitter Diagonal Stripe Gel Nail Polish Design

Radiate Christmas simplicity with this minimal nail art. Watch our YouTube tutorial here or follow along using the instructions below.
Gel Nail Polish used: Base Coat, Green With Envy, Silver Lining & Top Coat.
Gel Nail Art Brushes used: Short Striping Brush.
- Complete your nail prep.
- Apply a thin coat of Base Coat & cap the free edge. Cure under your Gel Nail Lamp for 60 seconds.
- Using your Short Striping Brush & Green With Envy, paint a diagonal line across your nail. Fill in one side with your Short Striping Brush or the polish brush, cap the free edge & cure under your Gel Nail Lamp for 60 seconds.
- Apply another coat of Green With Envy & cap the free edge. Cure under your Gel Nail Lamp for 60 seconds.
- Using your clean Short Striping Brush & Silver Lining, gently paint a line alongside the edge of Green With Envy. Cure under your Gel Nail Lamp for 30 seconds.
- Apply another line with Silver Lining. Cure under your Gel Nail Lamp for 60 seconds.
- Apply a thin coat of Top Coat & cap the free edge. Cure under your Gel Nail Lamp for 60 seconds.
- Apply Cuticle Oil around your nails & rub into your skin to nourish & moisturise.
Snowflake Magic Gel Nail Polish Design

Winter might not be cold in New Zealand, but there's something about glitter ombre and delicate snowflakes that just feels holiday-ready. Watch our YouTube tutorial here or follow along using the instructions below.
Gel Nail Polish used: Base Coat, Au Naturel, A Dozen Roses, Red Tinsel, Fine Glitter, Just White, Matte Top Coat & Top Coat.
Gel Nail Art Brushes used: Long Striping Brush & Dotting Tool.
- Complete your nail prep.
- Apply a thin coat of Base Coat & cap the free edge. Cure under your Gel Nail Lamp for 60 seconds.
- A Dozen Roses nails: Apply two thin coats of A Dozen Roses & cap the free edge. Cure after each coat for 60 seconds under your Gel Nail Lamp.
- Au Naturel nails: Apply two thin coats of Au Naturel & cap the free edge. Cure after each coat for 60 seconds under your Gel Nail Lamp.
- Red Tinsel ombre nail: Lightly dab Red Tinsel onto the base of your nail, fading it out as you get further up the nail. Remove any excess polish off your brush if needed to blend it out. Cure under your Gel Nail Lamp for 30 seconds.
- Fine Glitter ombre nail: Lightly dab Fine Glitter onto the base of your nail, fading it out as you get further up the nail. Remove any excess polish off your brush if needed to blend it out. Cure under your Gel Nail Lamp for 30 seconds.
- Snowflake nail: Use your Long Striping Brush & Just White, to gently paint a vertical line in the center of your nail. Paint a short horizontal line & then two diagonal lines through the center of the long line.
- Paint short angled lines sprouting out of the ends of the snowflake.
- Using your Dotting Tool, paint a large dot in the center of the snowflake and smaller dots on the ends of all the lines. Cure under your Gel Nail Lamp for 30 seconds.
- Apply a thin coat of Matte Top Coat & cap the free edge. Cure under your Gel Nail Lamp for 60 seconds.
- Using your clean Large Striping Brush & regular Top Coat, paint over just the snowflake to make this shiny. Cure under your Gel Nail Lamp for 60 seconds.
- Apply Cuticle Oil around your nails & rub into your skin to nourish & moisturise.
Xmas Assortment Gel Nail Polish Design

Pick one of these designs for all your nails, or replicate this adorable mismatched look. Watch our YouTube tutorial here or follow along using the instructions below.
Candy cane nail art
Gel Nail Polish used: Base Coat, Fine Glitter, Just White, A Dozen Roses, Fine Glitter, Just White & Top Coat.
Gel Nail Art Brushes used: Short Striping Brush.
- Complete your nail prep.
- Apply a thin coat of Base Coat & cap the free edge. Cure under your Gel Nail Lamp for 60 seconds.
- Apply a thin coat of Fine Glitter & cap the free edge. Cure under your Gel Nail Lamp for 60 seconds.
- Using your Short Striping Brush & Just White, gently paint lines leading into a curve to create the candy cane shapes. Cure under your Gel Nail Lamp for 10 seconds.
- Using your clean Short Striping Brush & A Dozen Roses, paint fine lines to create the candy cane stripes. Cure under your Gel Nail Lamp for 10 seconds.
- Apply a thin coat of Top Coat & cap the free edge. Cure under your Gel Nail Lamp for 60 seconds.
- Apply Cuticle Oil around your nails & rub into your skin to nourish & moisturise.
Reindeer nail art
Gel Nail Polish colours used: Base Coat, Au Naturel, Dirtbag, Black Out, A Dozen Roses & Top Coat.
Gel Nail Art Brushes used: Detail Brush & Dotting Tool.
- Complete your nail prep.
- Apply a thin coat of Base Coat & cap the free edge. Cure under your Gel Nail Lamp for 60 seconds.
- Apply a thin coat of Fine Glitter & cap the free edge. Cure under your Gel Nail Lamp for 60 seconds.
- Apply two thin coats of Au Naturel & cap the free edge. Cure after each coat for 60 seconds under your Gel Nail Lamp.
- Using your Detail Brush & Dirtbag, paint two wavy lines to create the antlers. On the inside of the antlers paint smaller detailed antlers. Cure under your Gel Nail Lamp for 10 seconds.
- Using your Dotting Tool & Black Out, dot two eyes. Cure under your Gel Nail Lamp for 10 seconds.
- Using your clean Dotting Tool & A Dozen Roses, paint a small circle for the nose. Cure under your Gel Nail Lamp for 10 seconds.
- Apply a thin coat of Top Coat & cap the free edge. Cure under your Gel Nail Lamp for 60 seconds.
- Apply Cuticle Oil around your nails & rub into your skin to nourish & moisturise.
Christmas bauble nail art
Gel Nail Polish colours used: Base Coat, Just White, Black Out, Champagne Showers & Top Coat.
Gel Nail Art Brushes used: Detail Brush.
- Complete your nail prep.
- Apply a thin coat of Base Coat & cap the free edge. Cure under your Gel Nail Lamp for 60 seconds.
- Apply two thin coats of Just White & cap the free edge. Cure under your Gel Nail Lamp for 60 seconds.
- Using your Detail Brush & Champagne Showers, move your brush in circular motions to create a circle near the top of your nail. Cure under your Gel Nail Lamp for 10 seconds.
- Using your clean Detail Brush & A Dozen Roses, paint two loops for the bow & two curved lines for the tie. Cure under your Gel Nail Lamp for 10 seconds.
- Using your clean Detail Brush & Champagne Showers, gently paint one line from the top of the ball towards your cuticle. Cure under your Gel Nail Lamp for 10 seconds.
- Using your clean Detail Brush & Black Out, gently paint another line on top of the Champagne Showers line. Cure under your Gel Nail Lamp for 10 seconds.
- Apply a thin coat of Top Coat & cap the free edge. Cure under your Gel Nail Lamp for 60 seconds.
- Apply Cuticle Oil around your nails & rub into your skin to nourish & moisturise.
Fairy lights nail art
Gel Nail Polish colours used: Base Coat, Silver Lining, Good as Gold, Damn You're Pine, Red Tinsel & Top Coat.
Gel Nail Art Brushes used: Short Striping Brush & Dotting Tool.
- Complete your nail prep.
- Apply a thin coat of Base Coat & cap the free edge. Cure under your Gel Nail Lamp for 60 seconds.
- Using your Short Striping Brush & Black Out, paint a wavy line to create the Christmas Light cord. Cure under your Gel Nail Lamp for 10 seconds.
- Using your Dotting Tool, randomly paint dots along the cord using Damn You’re Pine, Silver Lining, Red Tinsel & Good as Gold to create the lights. Cure under your Gel Nail Lamp for 10 seconds.
- Apply a thin coat of Top Coat & cap the free edge. Cure under your Gel Nail Lamp for 60 seconds.
- Apply Cuticle Oil around your nails & rub into your skin to nourish & moisturise.
Snowman nail art
Gel Nail Polish colours used: Base Coat, Just White, Black Out, Wildfire & Top Coat.
Gel Nail Art Brushes used: Detail Brush & Dotting Tool.
- Complete your nail prep.
- Apply a thin coat of Base Coat & cap the free edge. Cure under your Gel Nail Lamp for 60 seconds.
- Using your Dotting Tool & Just White, paint two circles for the snowman body with the lower half at the tip of the nail. Cure under your Gel Nail Lamp for 10 seconds.
- Using your clean Dotting Tool & Black Out, paint two dots for the buttons & two dots for the eyes. Cure under your Gel Nail Lamp for 10 seconds.
- Using your Detail Brush & Black Out, paint a thin line across the head, then a small square on top this to form the hat. Cure under your Gel Nail Lamp for 10 seconds.
- Using your clean Detail Brush & Wildfire, paint a sideways triangle for the nose. Cure under your Gel Nail Lamp for 10 seconds.
- Apply a thin coat of Top Coat & cap the free edge. Cure under your Gel Nail Lamp for 60 seconds.
- Apply Cuticle Oil around your nails & rub into your skin to nourish & moisturise.


